- Log in/Create your Shopify account on Shopify Partners.
-
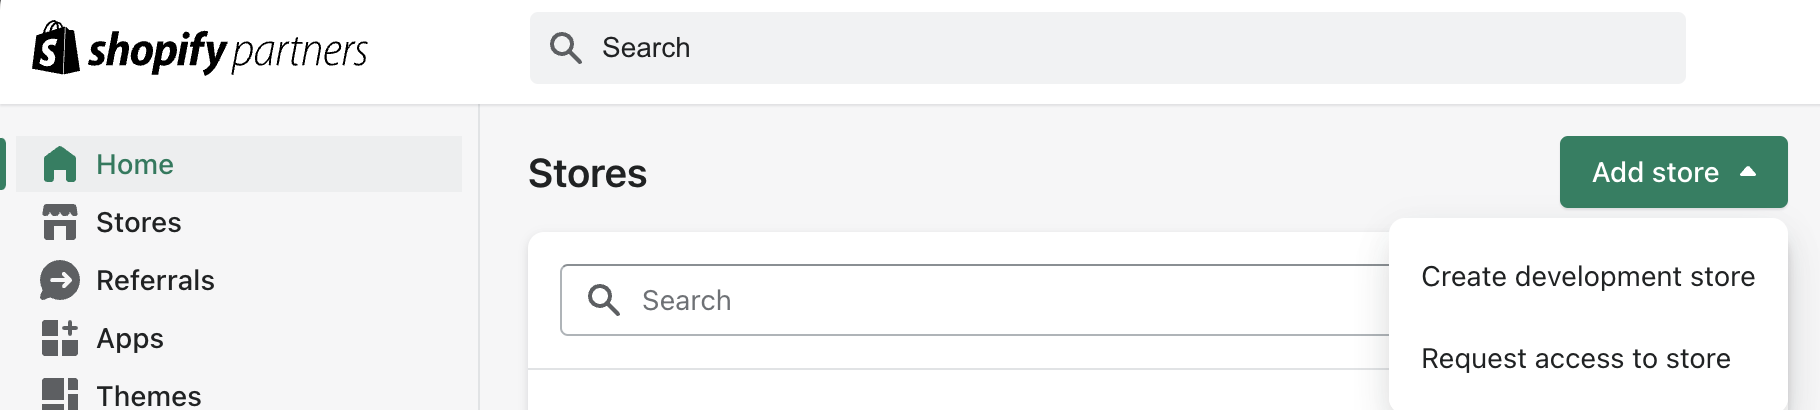
Click on “Add store” -> “Create development store”
-
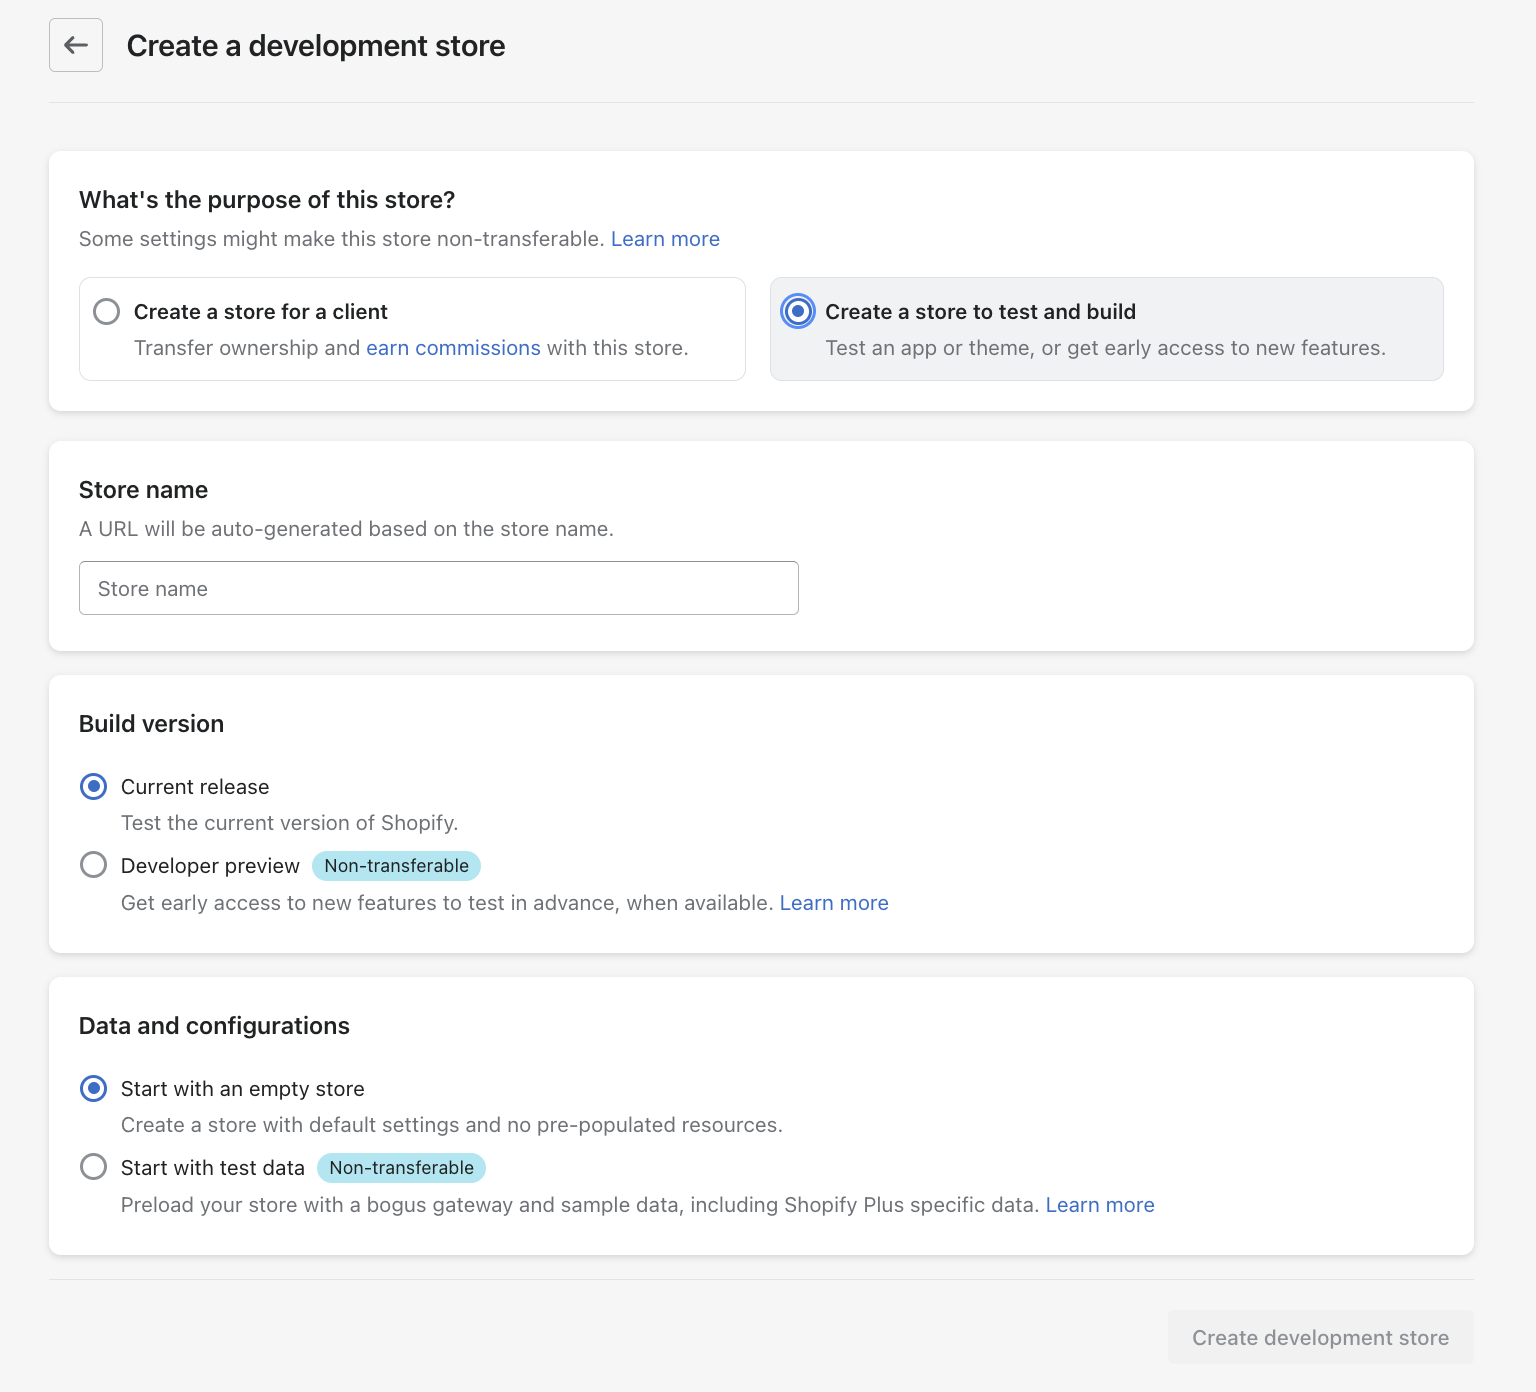
Select the “Create a store to test and build” option and fill out the details.
- Click on “Start with test data” if you’d like to start with some pre-filled products to your store.
- Once that’s complete, click on “Create development store”.
-
Now to add your own product:
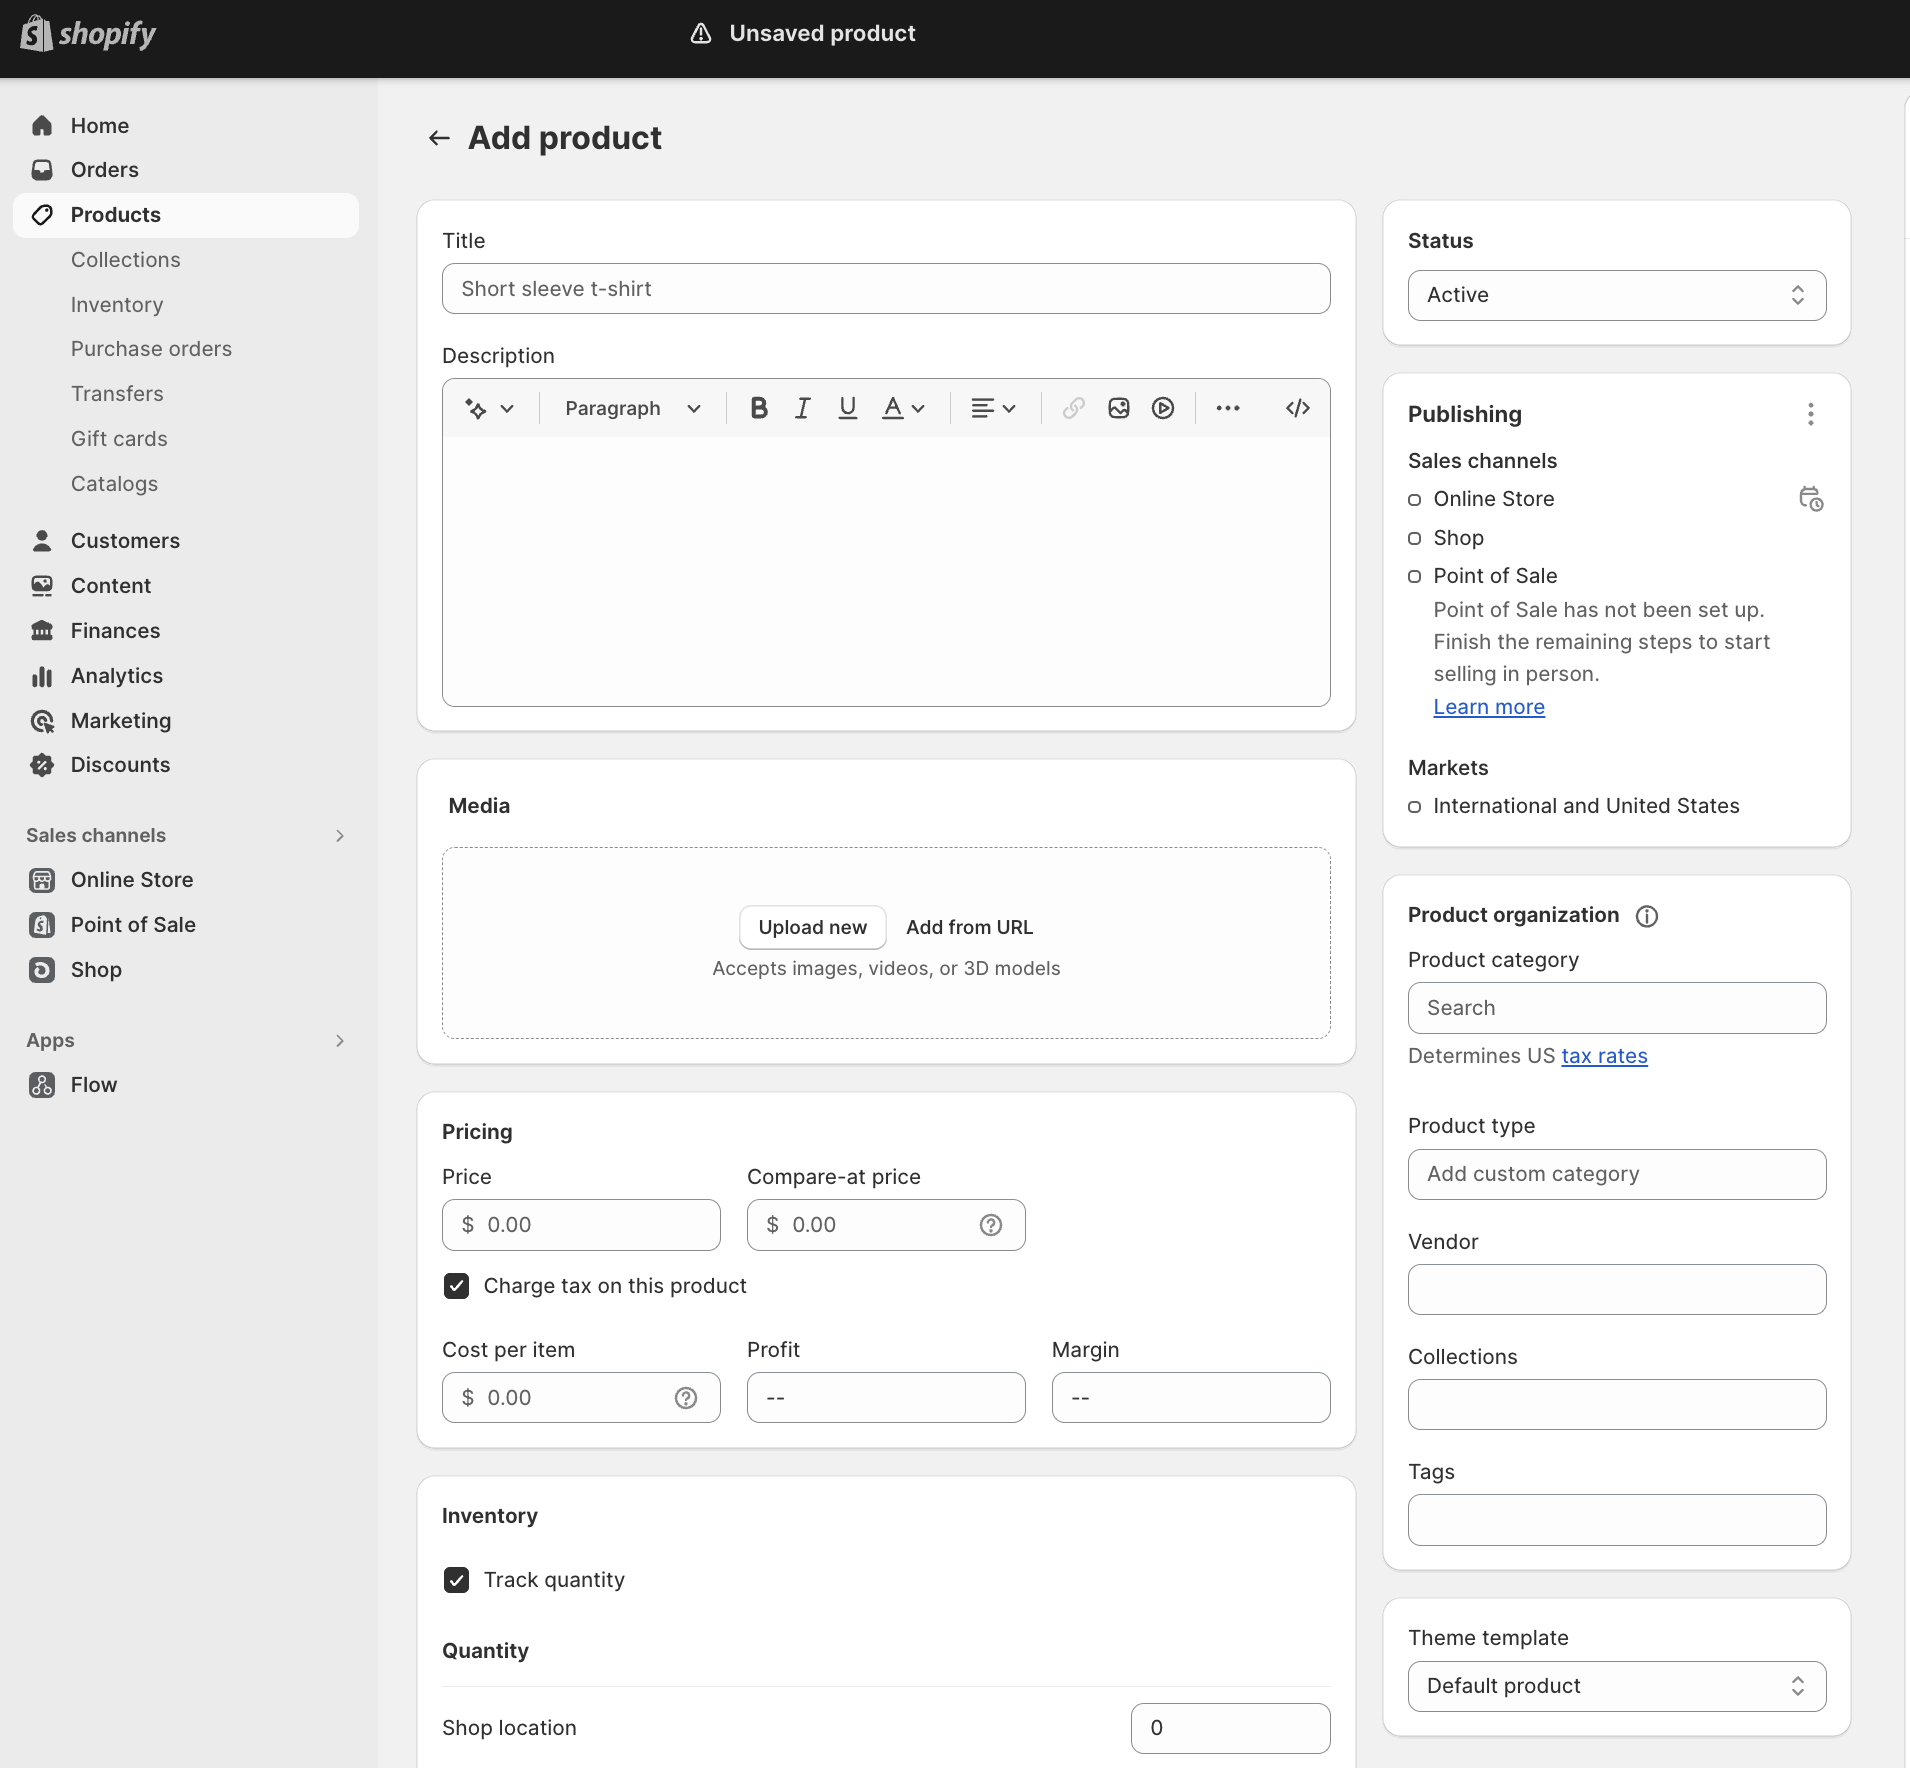
- Go to “Products” -> “Add your products”
- Fill out the product details
- Click on “Save”
-
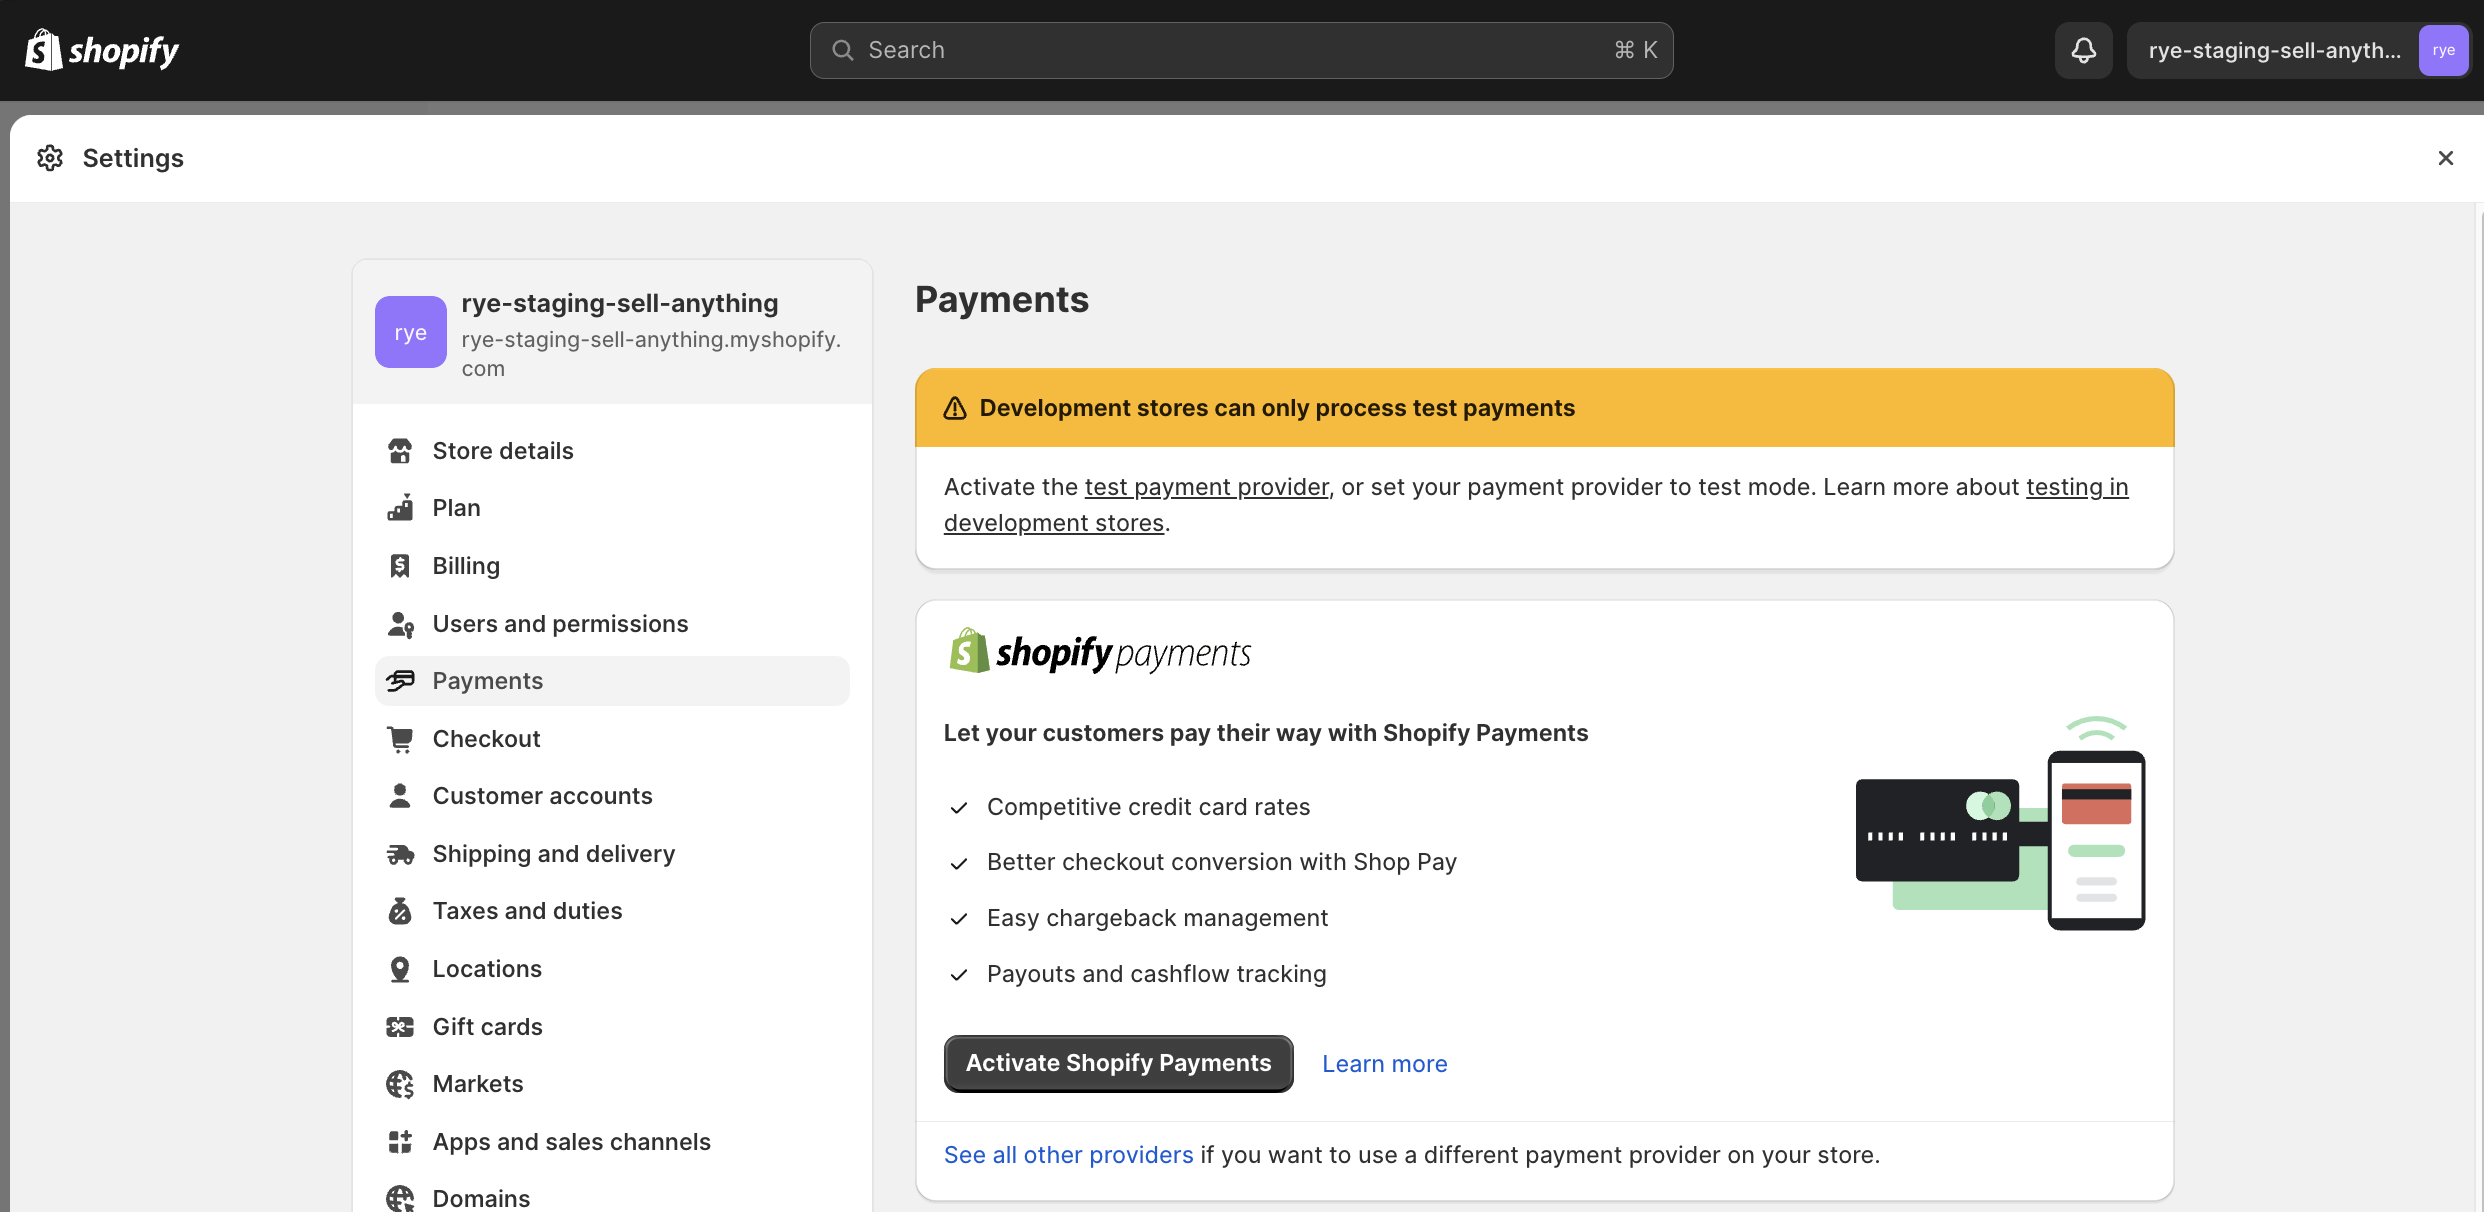
Now to set up test payments:
- Click on “Settings” (on the bottom left of the page)
- Go to “Payments” -> “Activate Shopify Payments”
-
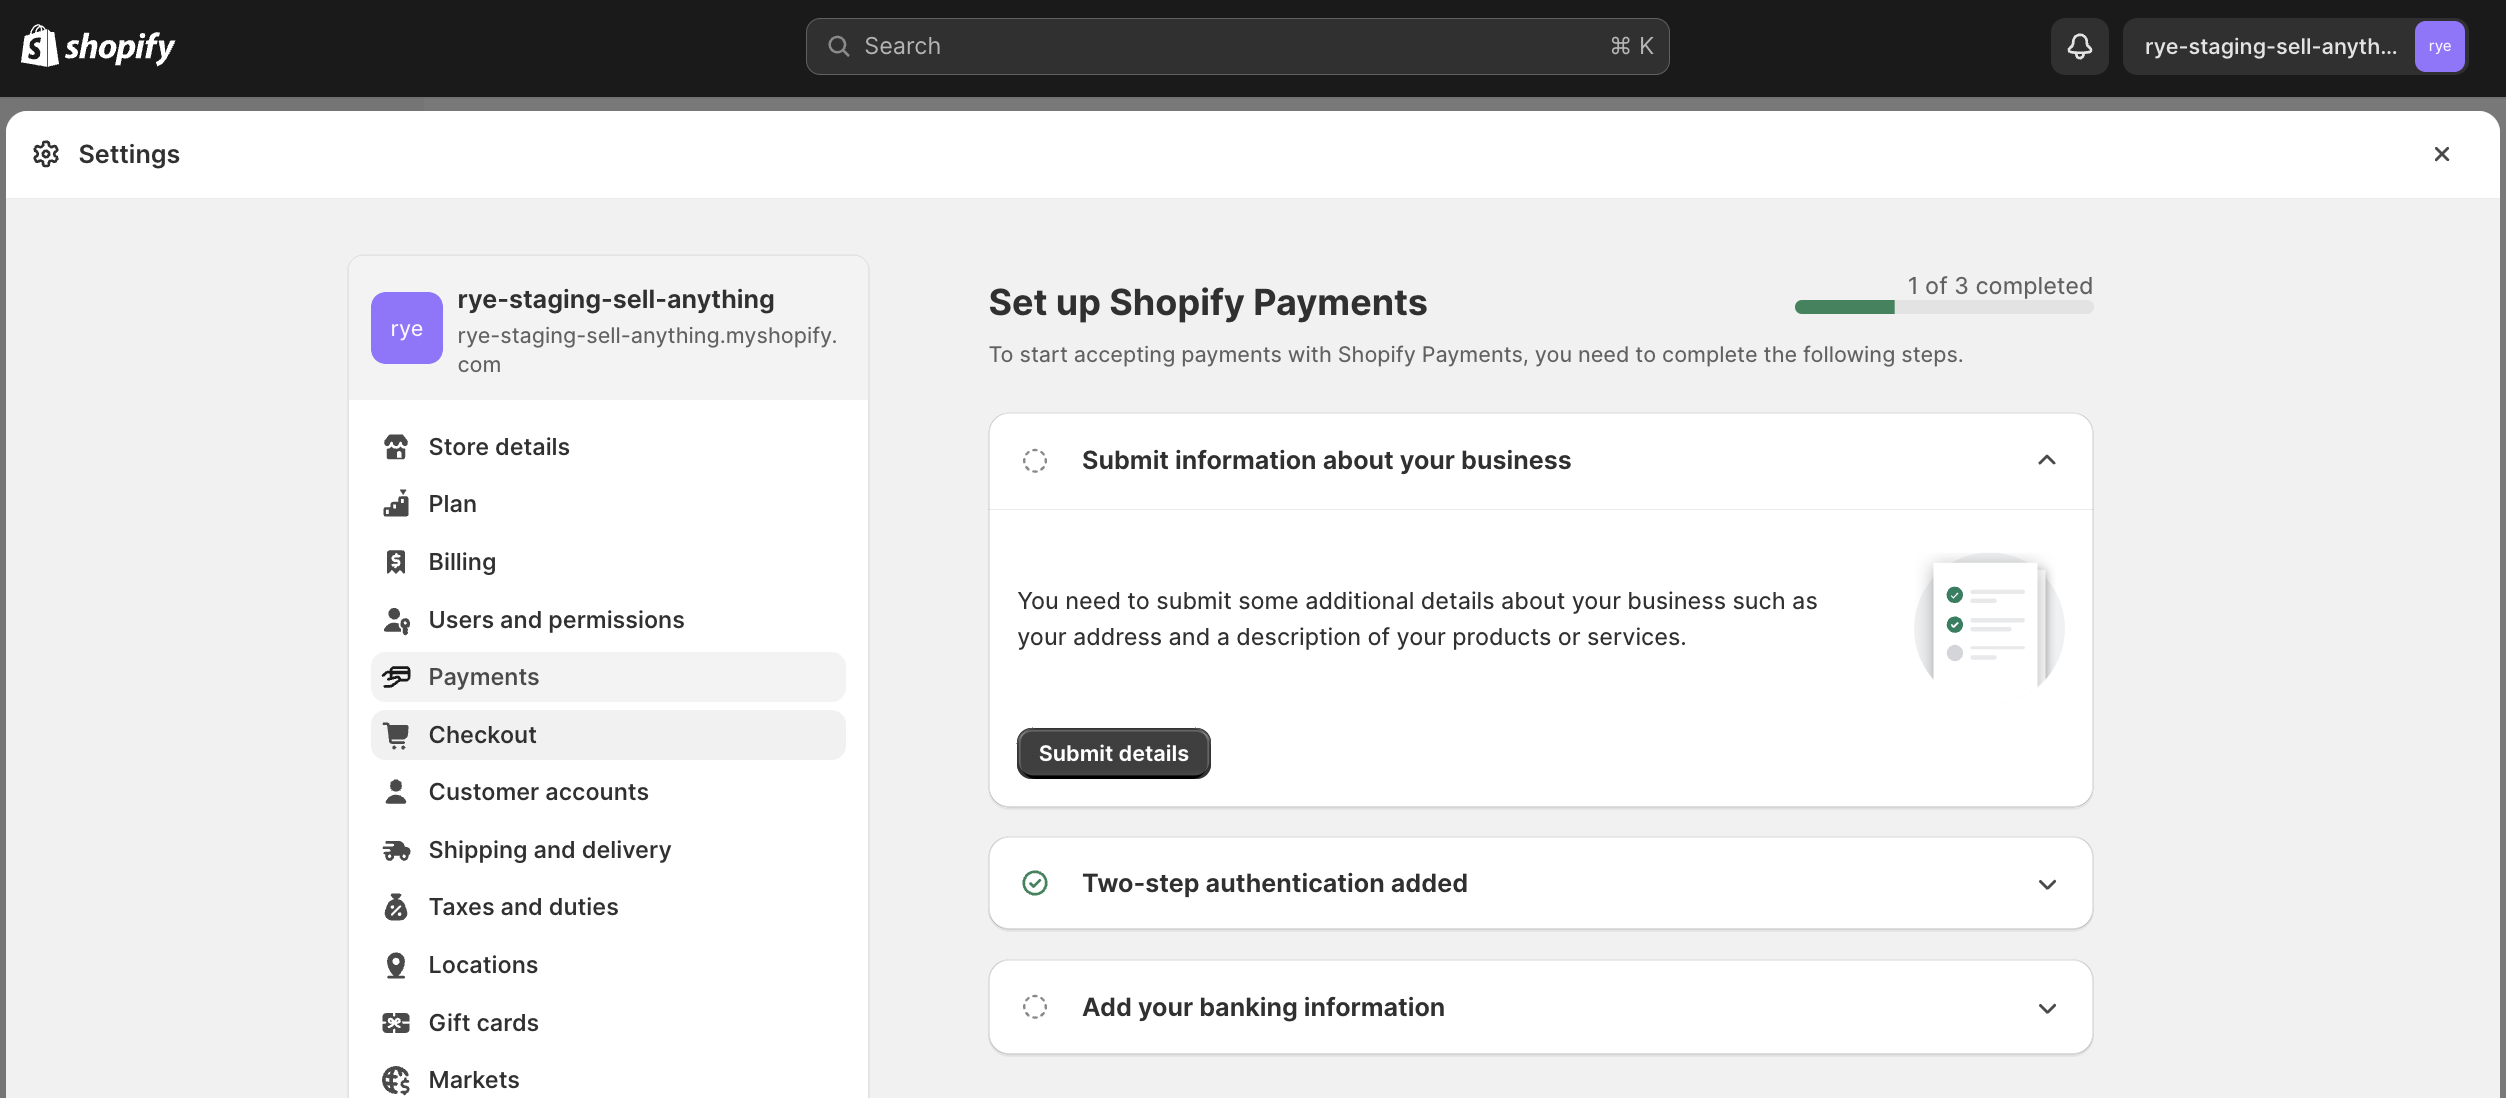
- Fill out the Address details and click on “Next”
- Under the “Submit information about your business”, click on “Submit details”
-
- Fill in the information and click on “Submit for verification”
-
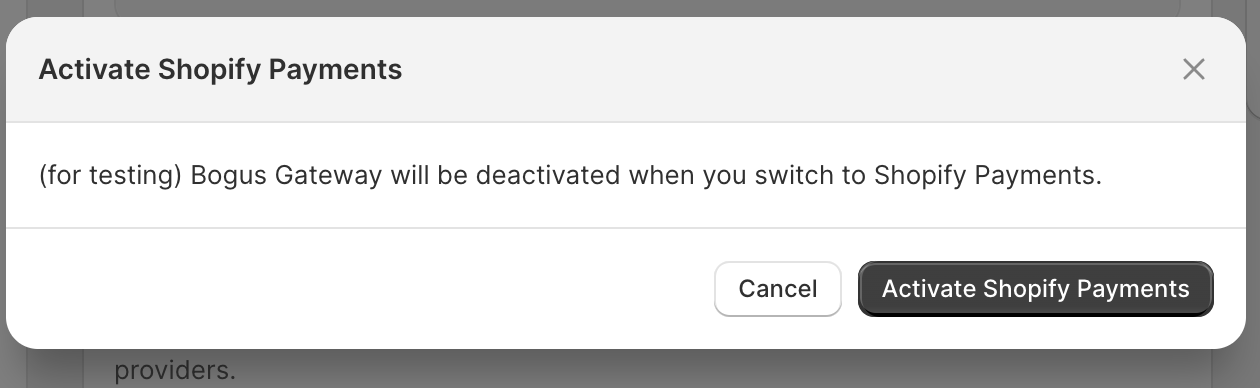
In Payments Enable Shopify Payments by clicking “Switch to Shopify Payments” -> “Activate Shopify Payment”
- Fill in the required information in order to enable Shopify Payments.
-
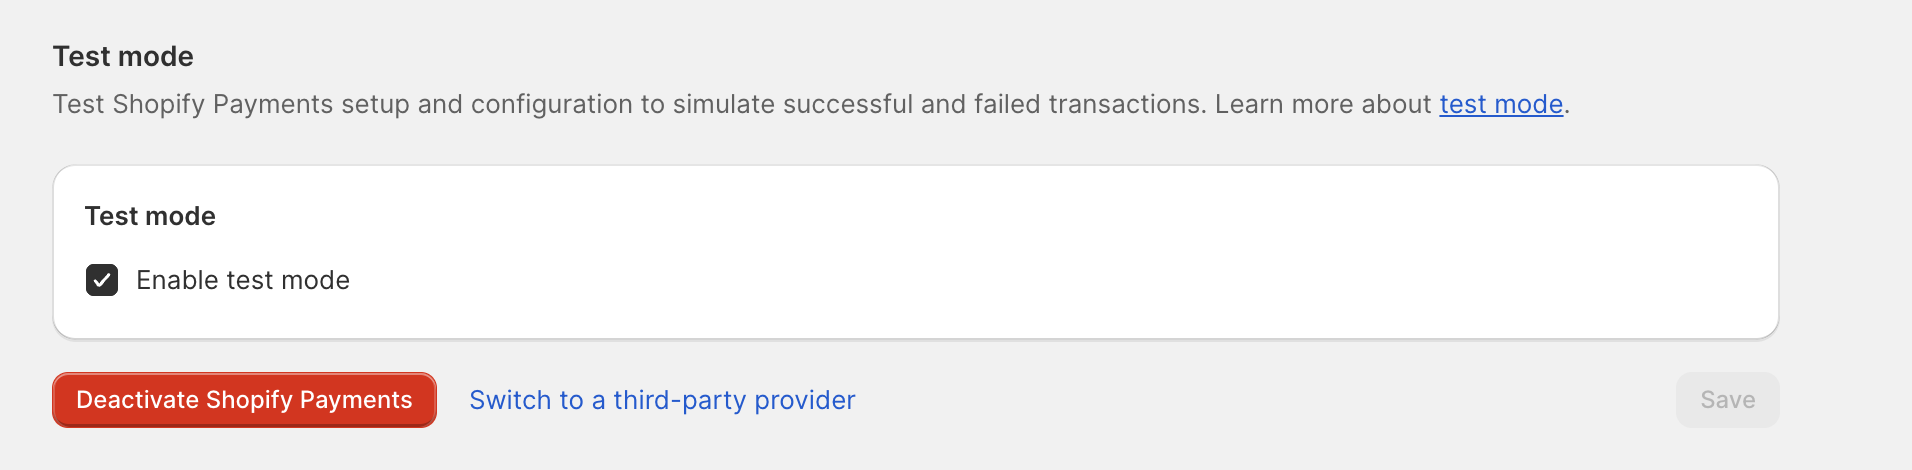
Enable Test Mode for Shopify Payments
- Click “Manage” on the Shopify Payments section
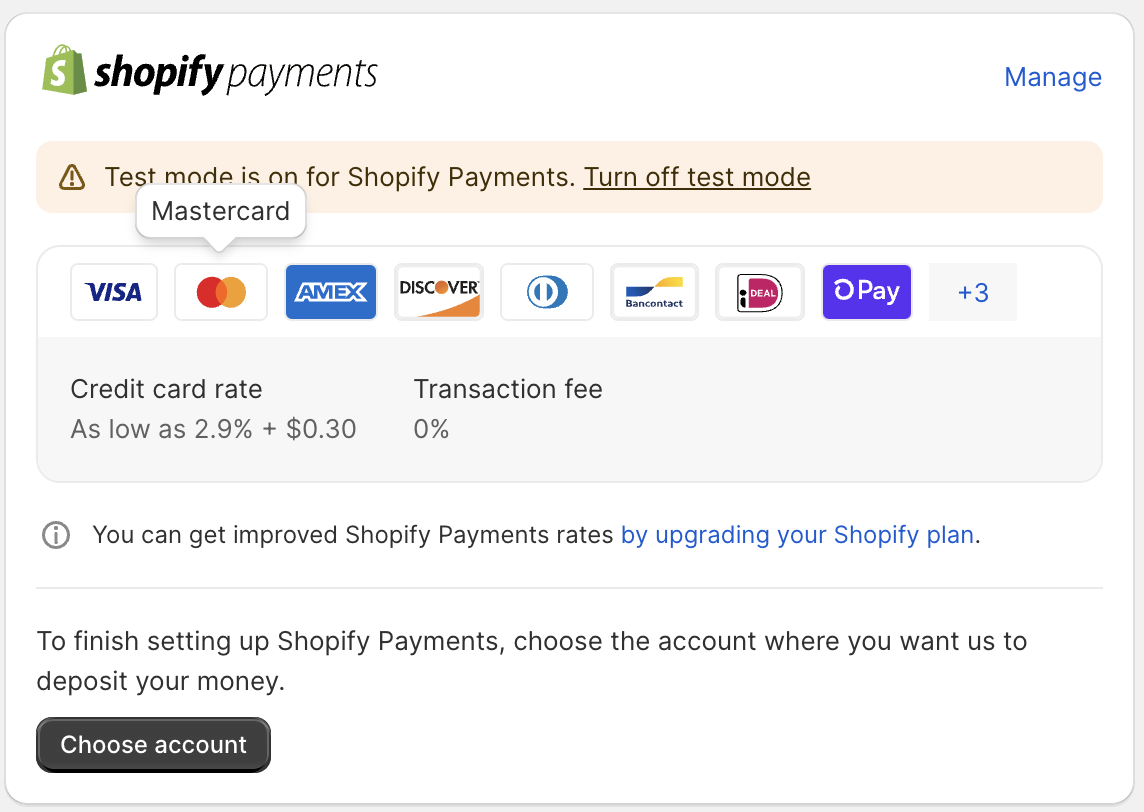
- Scroll to the bottom of the next screen and check “Enable test mode” and click “Save”
- Click “Manage” on the Shopify Payments section
- Install the Rye Shopify App on your store to test the Sync API (only works in our Production environment so far — use your Production Rye account)
- Publish your Shopify store to remove the password and test the Sell Anything API
- Is it necessary to provide the business tax ID and social security ID when creating my own test store? You will be required to provide information for those fields to set up your own test store and activate Shopify Payments.